
I’m distilling my own water – here’s how and why.

So we use distilled water in our house daily for many different purposes (not drinking – for cleaners, humidifiers, nasal irrigation, water spray bottles, etc). Distilled water seems to be scarce in supply and overpriced ($2/gallon or more in some instances). Facing the same issues? Get yourself a distiller. It’s not immediate, nor free – takes you about 5 hours and $0.20-$0.25 in electricity to distill yourself a gallon of water, and it will take a little bit of your time periodically – but… you wont run out. I’m using this distiller -> (link) combined with a couple of other items. For more info and some use cases, keep reading. If you use it daily – it will take a while, but it will pay for itself.

The Unit and the Process:

Distillers are all over the place and they look nearly identical. This particular distiller I chose (link in the intro) seems to have the best overall support/success rating according to my research, and it’s built really well. Also, important – it’s UL Listed for safety.

In all honesty, my research led me to two different units on Amazon – the one I ended up buying from “Megahome” (link) and another from a company called H20 Labs (link). It appears that these distillers are nearly identical if not the same unit with a couple of small differences (one uses carbon pouches and the other uses pods, for example, the use of which on either is optional). What drew me to these units were the 565-580 watt heater core, which, on my Megahome unit, I have verified with power monitoring devices. Some of the cheaper units out there claim to have 800 and 900 watt heater cores, but that seems to be overkill and some claim that when you go any higher than you need to, you just speed up the process which can actually cause the discharge water to re-mix with the VOCs produced that you really want to release from the water.

Based on some limited research, this claim seemed to have some validity to it. On top of that, I don’t want a counter-top mounted device to go any hotter than it needs to go to get the job done. Its possible the higher wattage would also lead to overall increased power consumption – but I would need to test that theory – because hypothetically, the point-in-time consumption would be higher, but the distillation process would be quicker – so it’s possible that point would be moot because the amount of power consumed on any one distiller run would be nearly the same. In any case – I settled on the Megahome unit because, at the time of my purchase, it was the lower priced of the two seemingly identical units.

The only other thing I would recommend is getting yourself a power on timer. I use this one -> (link). This allows you to set the device to turn off after a certain amount of time – for me, I set it around 5 hours. Why? All of these distillers basically operate the same, they heat the water up and the steam goes up into the top chamber where it is cooled and it runs out into the jar as pure distilled water.

The problem is – they all basically just heat until the water runs out, and then the element overheats which causes the thermal breaker to shut the device off. That’s stupid – you’re basically waiting for it to overheat and shut off while it burns all of the nasty sediment from your water to the base of the unit. Not only does it sound dangerous, it sounds stressful to the components in the distiller, potentially shortening the serviceable life of the unit, and it’s a cleaning nightmare – as evidenced by the pictures of “distiller sludge” in the reviews on many distillers. Unless you’re distilling pond water, any sludge left behind should be mostly mineral salts and should look like, well, salt. If the sludge in your unit is brown, it’s getting burned somehow.

Further, if you overheat and burn the salts after the run, the exhaust fumes only have one place to go, which is, you guessed it, right out the nozzle pointed into your finished product.. yuck. Do yourself a favor and shut the unit off (manually or automatically with a timer like mine) before it gets to this point.

There are other distillers that have a timer, but from my research they either were not UL listed, they used oversized heating elements, or didn’t get great reviews. If a distiller choice met any of these three criterion based on my research, I eliminated it from the final selection list.

I have found that with this Megahome unit, I fill the tank to the “full” line with cold tap water, plug it in, set the timer on the plug for 5 hours and let it run. When it’s done, I basically have right around a gallon of distilled water, and there is still probably 15-20 oz of water in the tank. This gives you two benefits – it avoids overheating the heater core, and it also keeps you from burning all of the nasty sediment left behind to the bottom of the stainless steel tank. Instead, you just dump and rinse it out. There will likely be a “ring” of salts visible in the bottom of the tank right over top of the heating element even after rinsing it out – but – that’s very easy to remove periodically.

About every 4-5 runs, I rinse the unit out well and pour in about 8-12 ounces of HOT water (usually I stick some water in a mug in the microwave to warm it up to just above hot tap temp and then dump it in). I add about 1 level tablespoon of citric acid to the water (super cheap in large quantities and has lots of other great uses besides making your Coke taste great – (link) – it’s basically just lemon dust, but it’s awesome as a cleaner).

I then swirl it around and all of the deposits that were burned on to the the tank (which wont be a lot, just a white ring on the bottom) just melt away. If they don’t completely resolve on their own, I wipe the bottom with a sponge or a washcloth and repeat. I then rinse it out well, dry it, and it’s ready for the next “batch” – looking like brand new again. If you follow the directions on most of these units, you’re going to burn through citric acid and elbow grease trying to get all of the sludge out of the bottom of them because you’ve baked it on and turned it from a small white salt ring just above where the heating elements are positioned to a gross brown sludge all over the inside bottom of the unit…. so this process I’ve established prevents that.

Use Cases for Distilled Water (from my POV):

1. In tank based humidifiers, it lets you avoid scale build up and since it’s been basically boiled, it’s bacteria free and it isn’t a great environment for mold/algae to form… so you spend a lot less time (almost none, in fact) cleaning your humidifier of the nasties that tap water leaves behind.

2. For nasal irrigation – it’s pretty much the only recommended option (I think some people use RO water, but… whatever, that’s even more expensive). Some people use normal tap water, but – that’s asking for a nasty infection – google it. It’s somewhat rare, but sometimes there is crap in tap water you don’t want to be injecting into your sinuses.

3. For spray bottles – think of a spray bottle you use to wet your hair in the morning. Ever put tap water in there and like three to five days later you spray your head only to find out it smells like pure mildew? Yeah – that doesn’t happen when you fill it with distilled water.

4. Adding on to 3 – sometimes people will make cleaners at home with citric acid and water or vinegar and water…. using distilled water prevents the mix from being tainted and stinky over time…. It may eventually go bad, but hopefully, not by the time you need to refill it.

5. In your steam equipped dryer. For similar cases to 1 listed above, this keeps your dryer from scale mucking up the internal components. In fact, in any appliance or tool that produces steam (as long as it isn’t for consumption, like in a steam nozzle on a cappuccino machine), distilled water is guaranteed to be better for it long term. That includes steam mops, carpet cleaners, anywhere that running “hard water” through it may eventually cause a clog or other issue. It keeps you from having to replace that “rarely used” carpet cleaner every 2 years right when you need it most because it’s clogged all of the sudden.

6. For CPAP machines – distilled water is the only recommended type of water that is recommended for similar reasons to #2, above.

7. Some people drink it. I see the appeal – it’s pretty pure and bacteria free. The purported problem is that it’s too pure. It has no minerals, it’s absent of fluoride, and supposedly sucks minerals out of your body when ingested. I’m not a doctor, but neither are most of the people out there claiming it’s ok. In fact, most of the people peddling that theory are distiller manufacturers it seems – many of which aren’t even US companies. So – in that regard, unless your doctor tells you to do it for a specific reason – I wouldn’t. Besides the obvious, it tastes…. well… even more bland than water.  Yuck. 🙂

I’m sure there are many other use cases… but for me, these are the primaries. So far, so good… if you’re tired of paying for distilled water, consider it… it’s going to take a while to make enough distilled water to cover the cost of this unit – but, I typically go through around a gallon every 1-2 days (especially with the humidifiers in a cold, dry Ohio winter), so – it really won’t take as long as I initially thought.

Add on top that I am no longer going through several plastic bottles of distilled water every year (I’m storing it in 1/2 gallon glass containers) and the benefit is both financially and environmentally sound, which I like.

Until next time…. cheers (without distilled water in your glass 🙂)

Gama sonic gs-9i Solar Bollard Installation

Solar… Take Two?

After the success of converting my natural gas post lamp to solar a couple of months ago, I decided to find another application for solar lighting at home.

At my house, I have a pad at the end of the driveway. This makes it nice as a “turning point” for backing out of our side-load garage, but it also commonly becomes a parking spot for visitors. If you pull straight on to the pad and park your car, the drivers side of your vehicle will be quite dark when you get out because the positioning of your vehicle blocks most of the light coming from the coach lights on our garage.

Figuring out a way to add some light to the driver side of this pad seems to be a perfect opportunity for a solar fixture. One of the beauties of Solar lighting is that all you need is a purpose – installation is a breeze – there are no wiring considerations to be made, no contractors to be called, all you need is a little DIY spirit and a product that “fits the bill” and you’re good to go.

In my own experience thus far, Gama Sonic’s products have proven to provide reliable dusk to dawn lighting in most conditions and they have a large range of products to fit many styles and applications. After some research, it seems that Gama Sonic has a solar bollard light (pictured below) called the GS-9i that would be perfect for adding a little bit of courtesy light to this pad on the driveway.

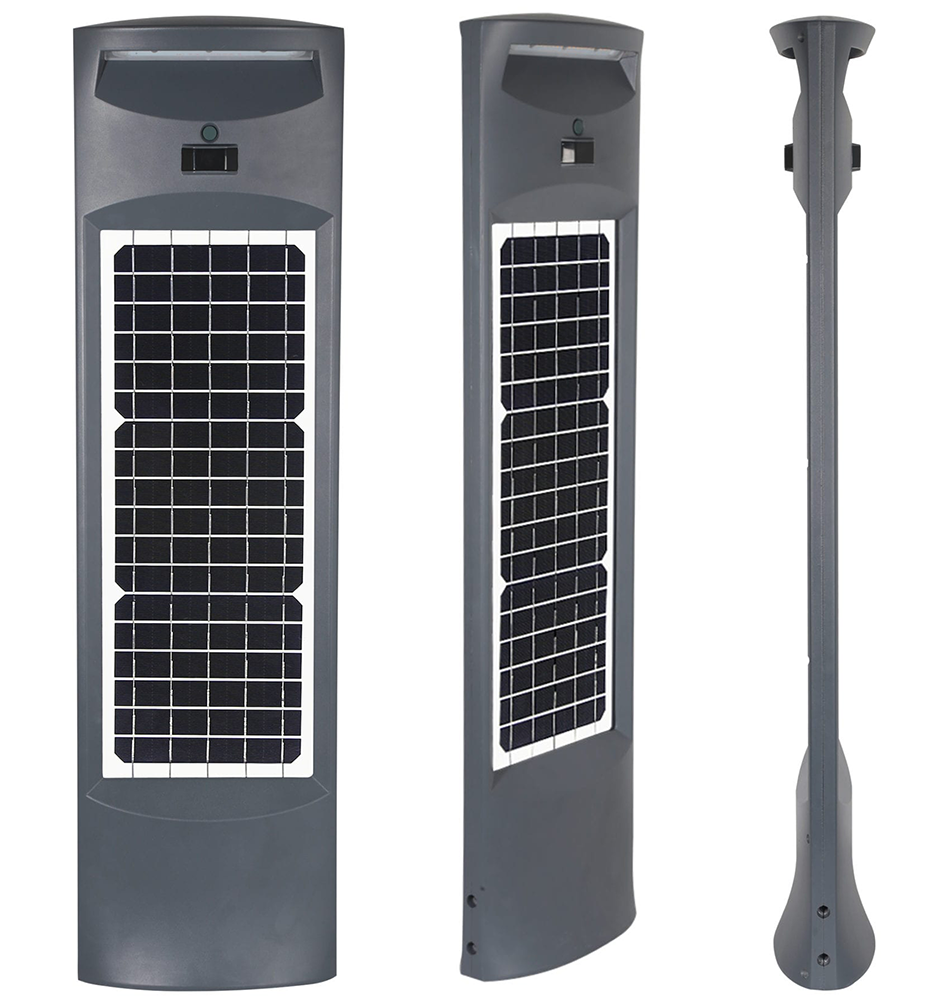
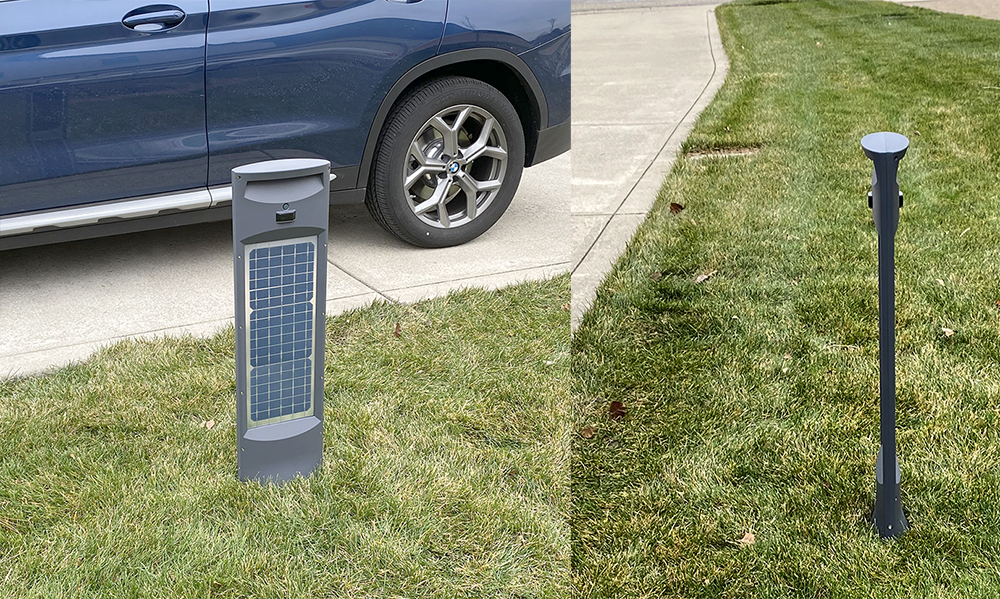
The GamaSonic GS-9i Commercial Solar Bollard pictured from the front, at an angle, and from the side.


This bollard style light is a tall and thin column (Approx 31.25″ tall, 8.75″ wide and 3.5″ deep) with a pretty neat design. It’s intended for commercial installation (think illuminating walking paths, parking areas, etc) – but it seems to me that it would be just as well suited for the type of application I was considering at home – so after another quick conversation with Matt Cohen at Gama Sonic – one was on it’s way to my door.

The unboxing…

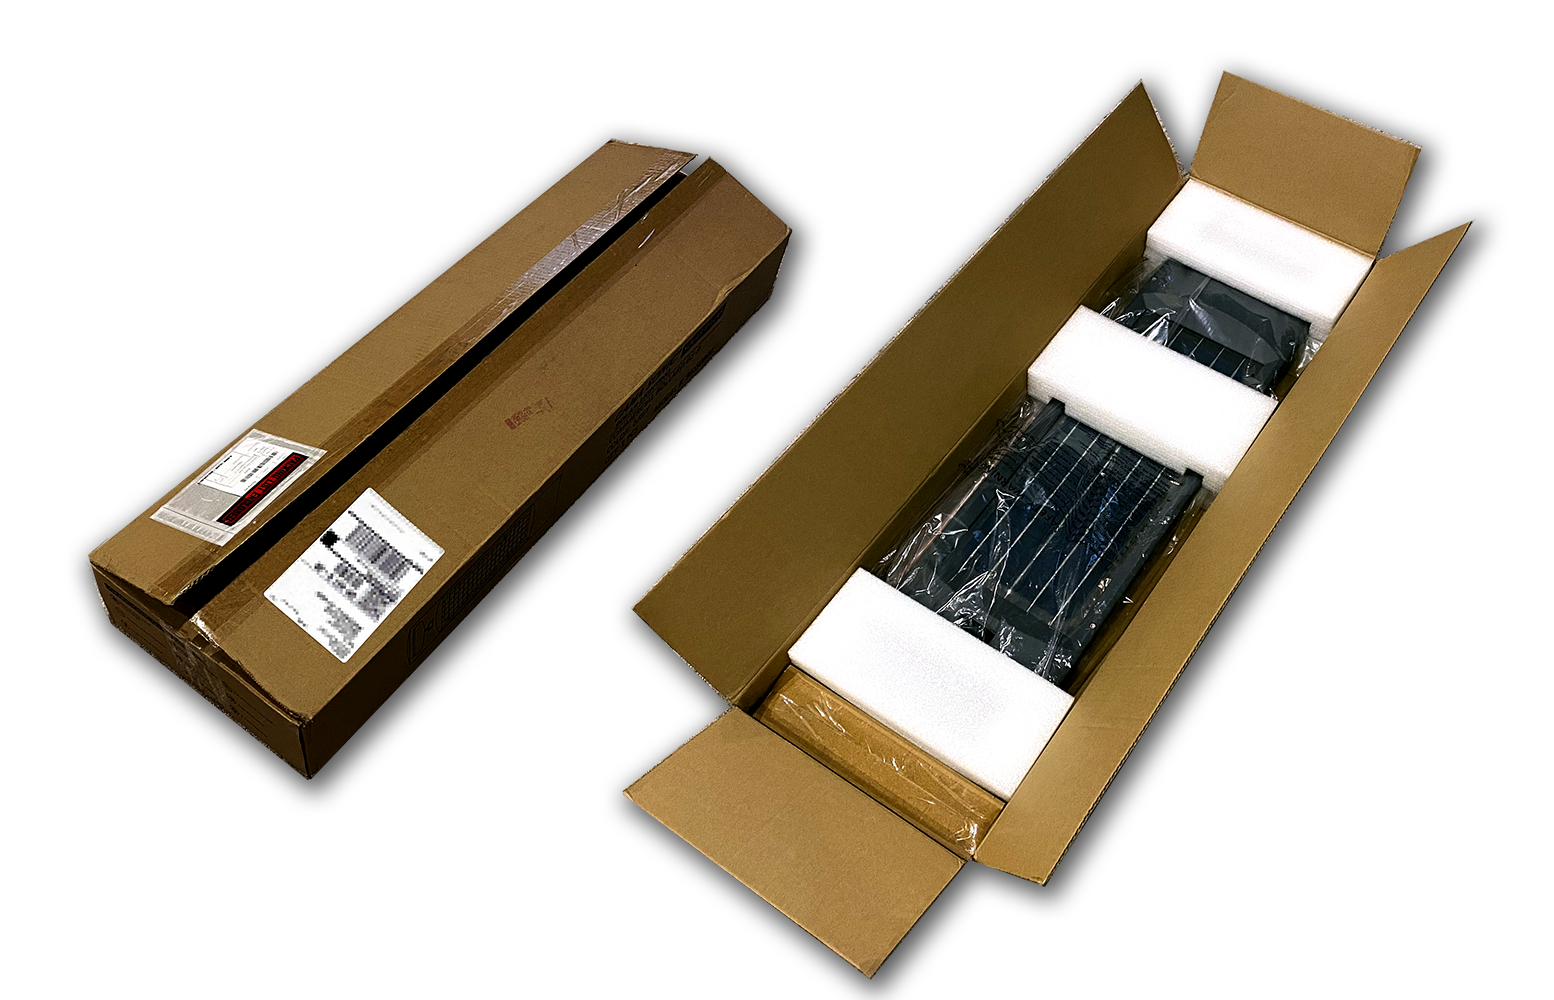
Much like last time, the bollard arrived via UPS. It came in a long, thin sturdy package with plenty of well designed styrofoam packing material to keep it safe on the way to me.

The bollard came in a sturdy cardboard box with nearly arranged and sized styrofoam pieces for support. The hardware for installation was in a separate box outside the foam (bottom of the right picture).


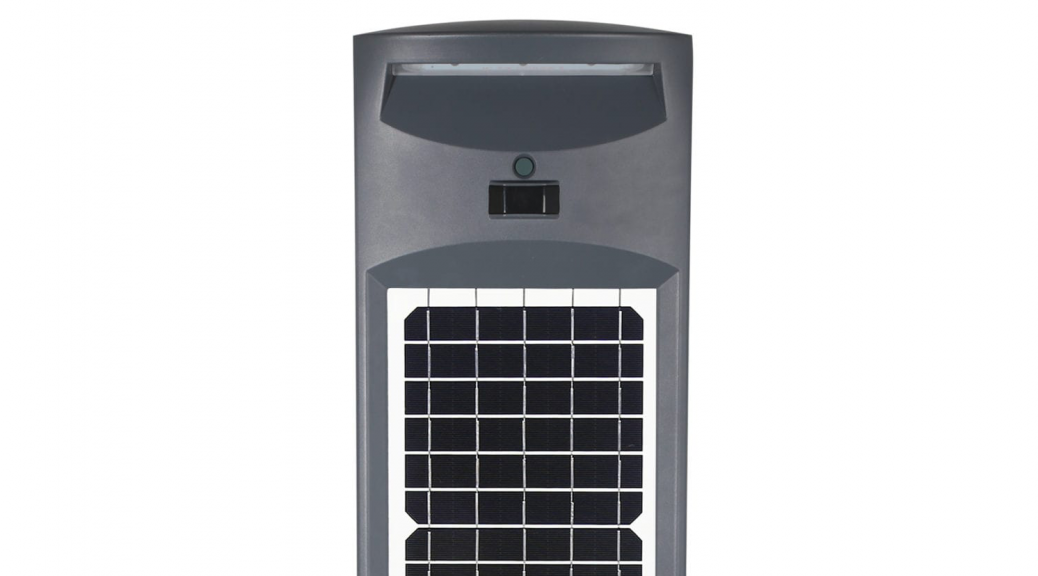
I removed the bollard from the packaging and was impressed by the build quality and some of the more subtle design features. The main body of the enclosure is cast aluminum with a powder coated charcoal grey finish (at the time of this writing, this is the only color option available). There is a thin strip of powerful SMD LEDs, an optics window, and a small power button near the top on either “face” of the unit.

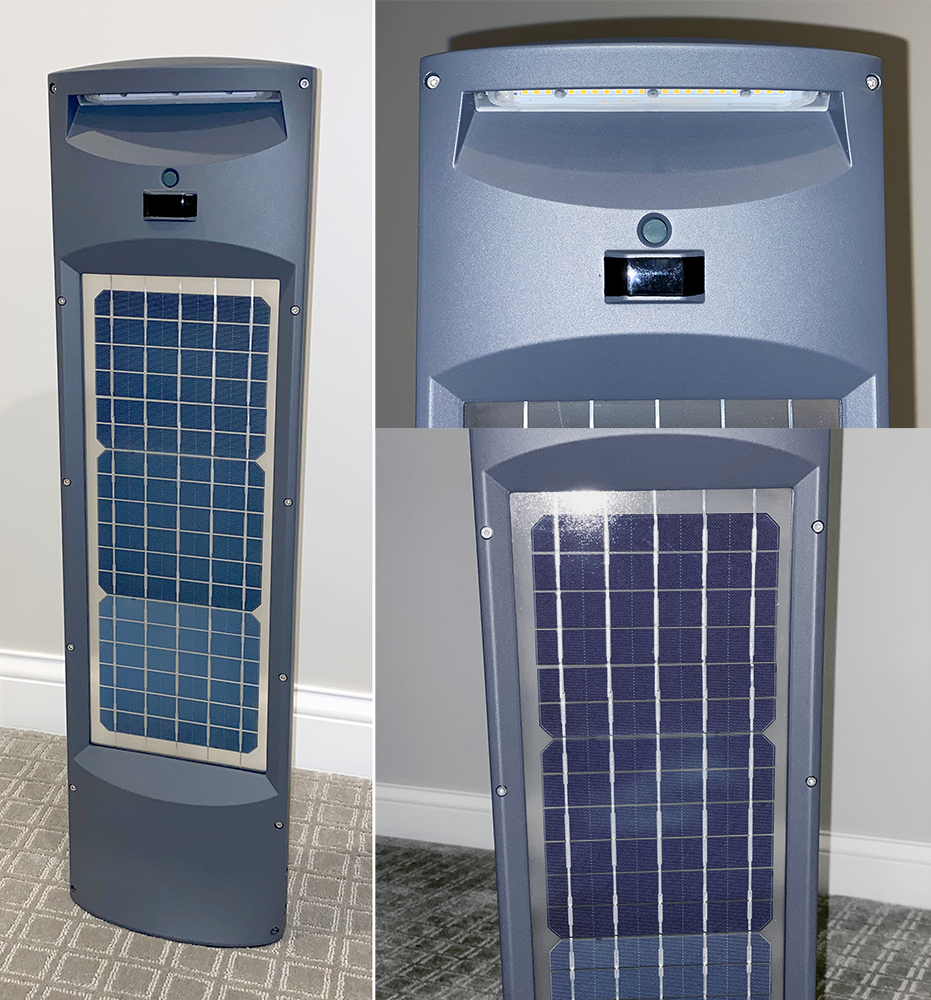
The bollard is all aluminum in a charcoal grey color. There are solar cells on both sides of the unit sandwiched between panes of tempered glass. On each side of the top is a row of powerful SMD Leds, a window for the optics (light and motion sensor) and an individual power button for each side.


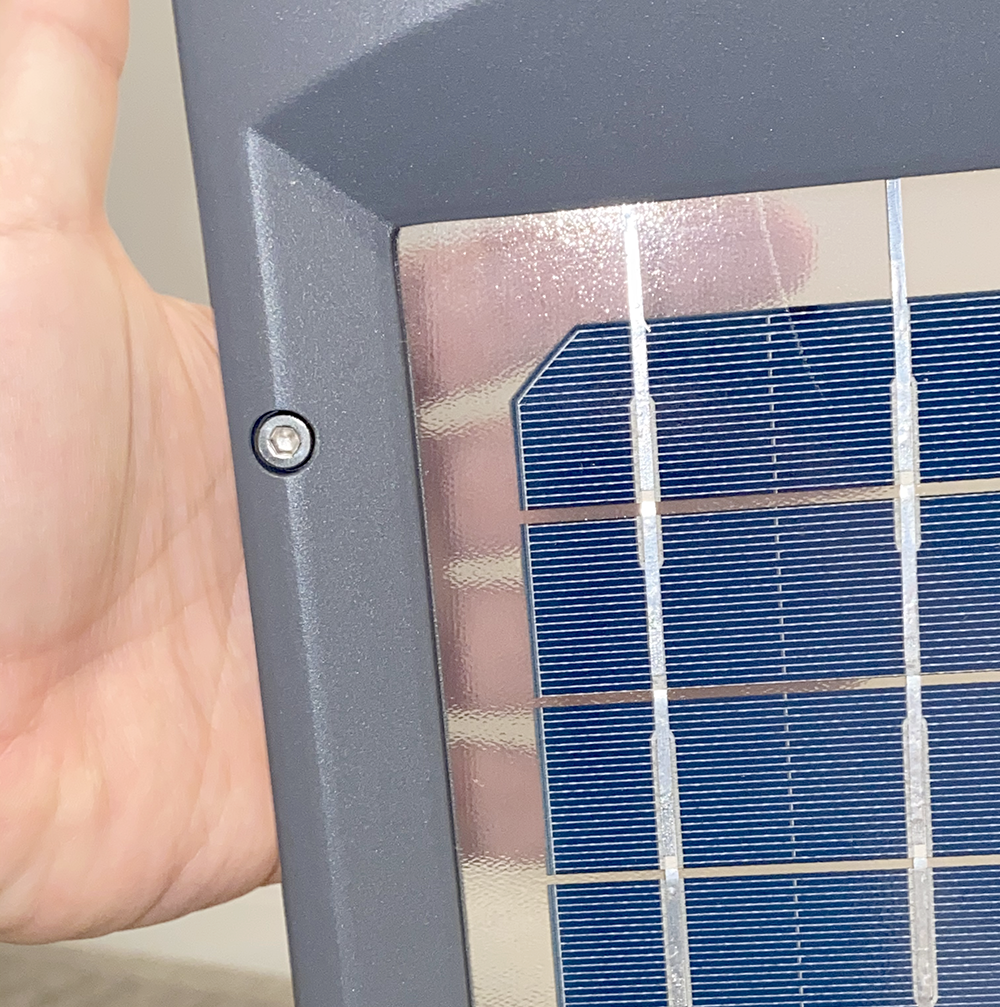
The solar cells are in what Gama Sonic calls a “bi-facial” arrangement. Obviously, this means that there are monocrystalline solar panels on either side (or face) of the unit. The panels themselves are enclosed in tempered glass (another build quality bonus) which makes them easy to clean and adds to the durability and longevity of the product. What isn’t obvious in the marketing materials or pictures on their website, however, is that the solar panels appear to “float” in the middle of the glass structure – which is a neat design detail that looks quite cool in person.

A really cool design element – the “Bi-Facial” solar cells are enclosed in tempered glass that remains translucent – it gives the solar panel the illusion of “floating” in the middle of the housing – it’s a neat touch that looks cool in person.


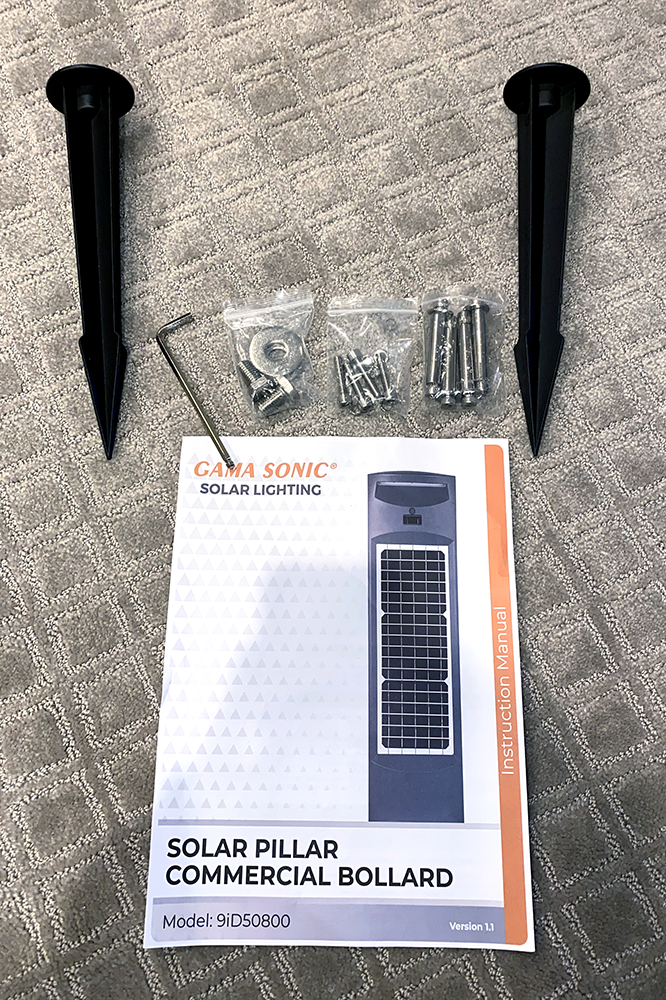
The package also includes instructions and a mounting plate that can be used for mounting the bollard on either turf or concrete surfaces. For installing into concrete, four concrete anchors are included in the package. I will be installing this into turf – and the package includes two long metal spikes and two large bolts and washers that can be used to fasten the spikes to the plate. Finally, there are four stainless steel allen bolts with washers and lock washers that are used to secure the bollard to the mounting plate and an allen wrench.

The hardware package includes instructions, an allen wrench, a set of allen screws and washers for securing the bollard to the base, the base unit itself, four concrete anchors, two large metal spikes, and two bolts and washers for attaching the spikes to the base.


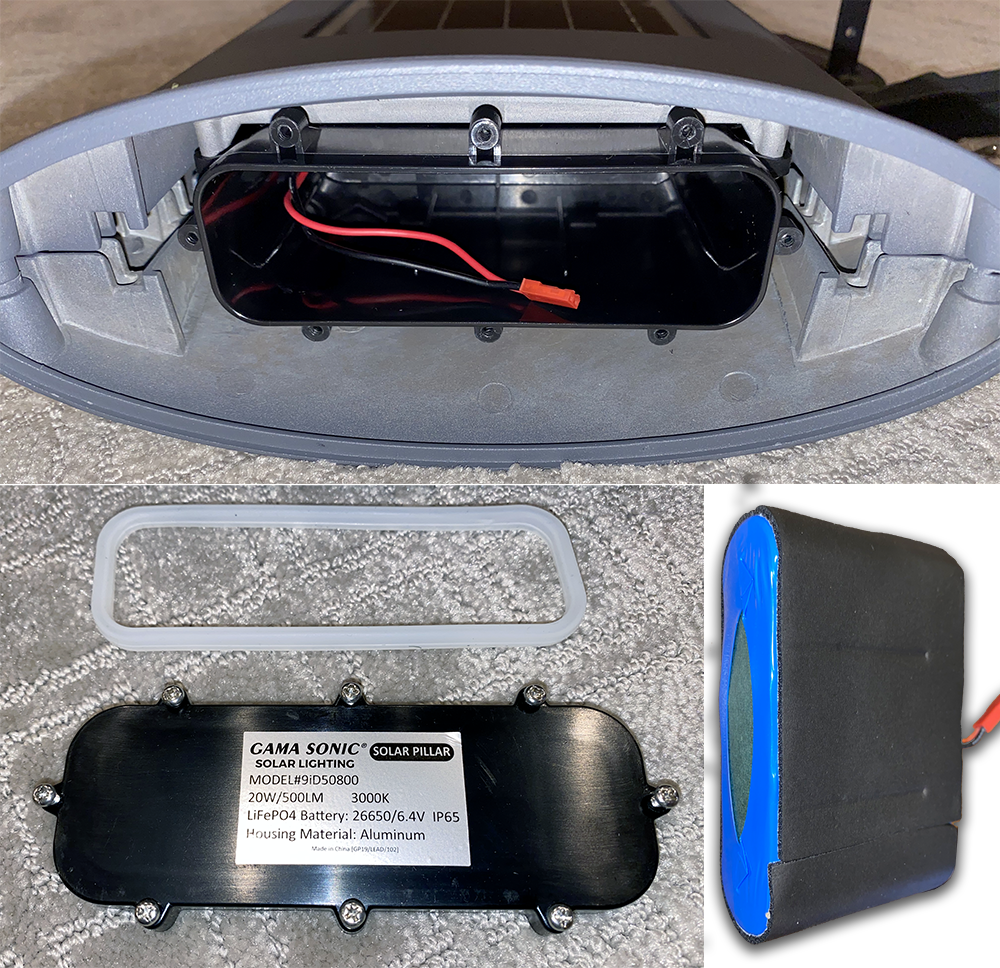
On the bottom of the bollard, there are eight screws that secure the battery compartment. Inside the battery compartment is a user replaceable 6.4V 6,000 mAh LiFePO4 battery pack. The pack is said to provide up to 48 hours of dusk-to-dawn operation even if it’s overcast and the solar cells are not able to recharge the battery.

Top: The battery compartment sans battery. Bottom Left: the gasket and cover for the compartment. Bottom Right: The 6.4V 6000 mAh LiFePO4 battery pack.


The battery compartment also has a rubber gasket to keep out the elements and the entire product is given an IP65 rating for weather resistance. This means this bollard is perfectly happy sitting in the elements and will provide reliable performance regardless of what mother nature throws at it.

Installation…

Looking at the manual, installation seems quite simple. If you’re installing on concrete, you simply locate the base where you want it to be and then mark and drill four 3/8″ wide x 3″ deep holes into the concrete. You then use the provided anchors to secure it into position. If you wanted to install on to a deck or a wooden surface, you could easily substitute four wood screws and a couple of washers rather than the concrete anchors – but this would be a true DIY install – such anchors are not included with the product.

For a turf install, like mine, you simply pound the two included spikes into the ground anywhere from 2.5″ to 4″ apart (center to center) and then secure the base to the spikes using the included bolts and washers. You’ll want to try to pay attention to how level the base is as you position and pound the spikes, however — if you are even marginally “off-level” it will be quite visible when the tall, thin tower is mounted on to the base.

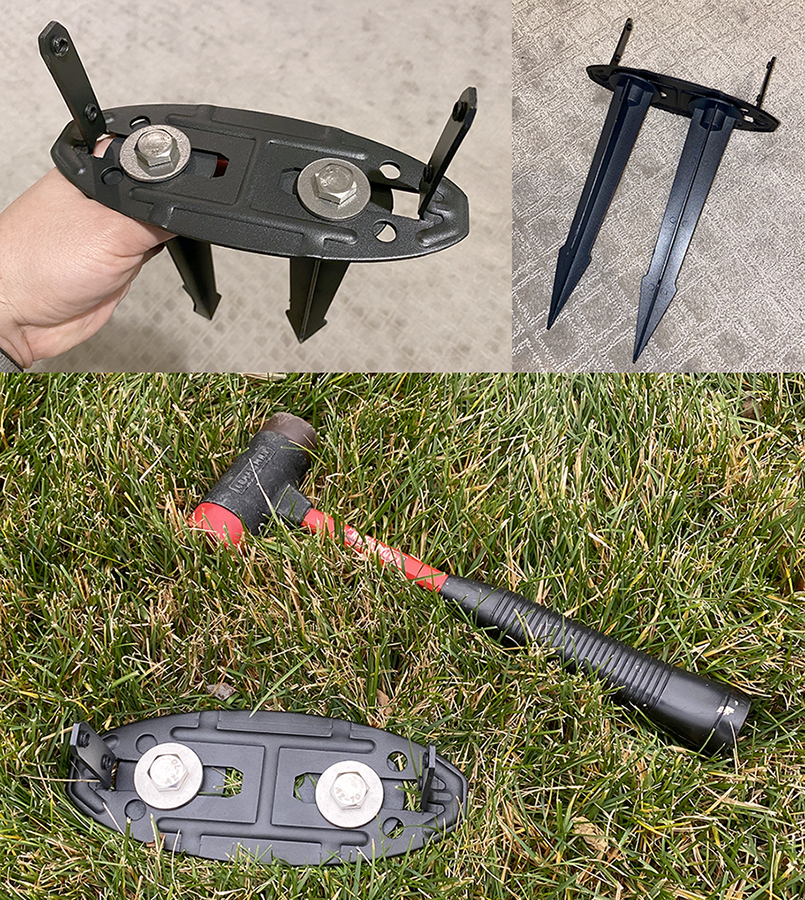
For my install, I chose to pre-assemble the spikes to the base and push the spikes into the ground by hand as far as possible while checking my progress with a level. Once I could no longer push the spikes by hand, I used a hard rubber mallet to continue the process, constantly checking and adjusting level as necessary.

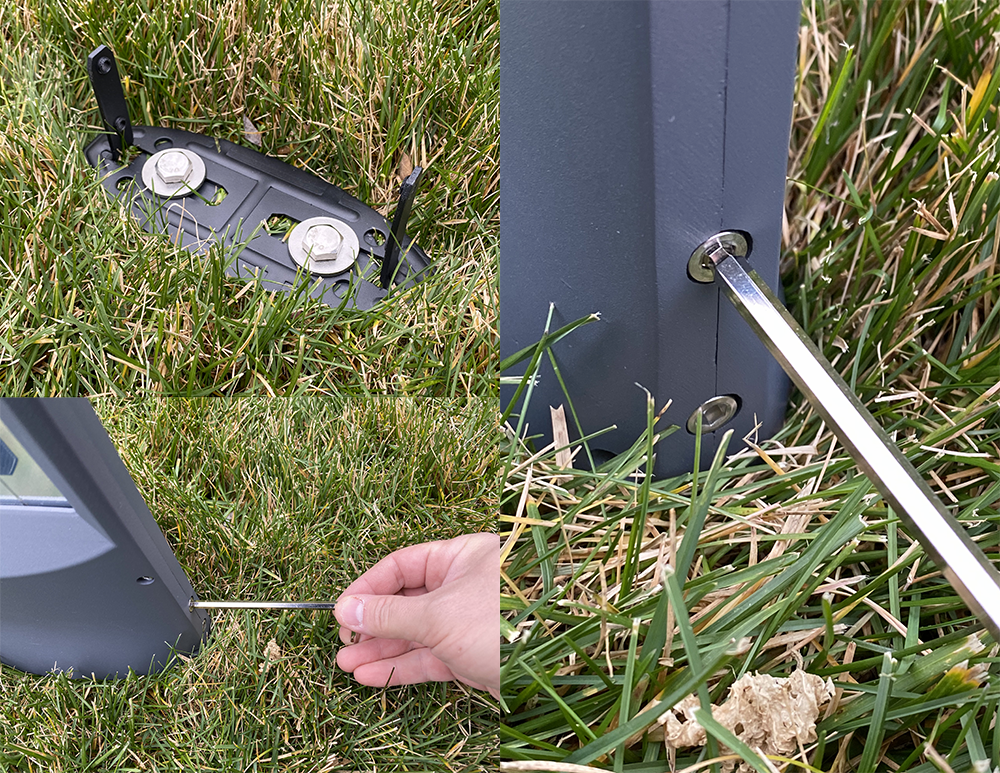
Top Left and Right – The base with the ground spikes preinstalled.
Bottom – The base after securely mounted into the ground – at first by hand, and then finished off by carefully alternating between a few blows from a rubber mallet and then level adjustment, repeated until the base was firmly down to ground level.


Once you have the base in place, you simply slide the bollard down onto the two fingers that are sticking upward and then secure it with the four provided allen bolts along with a combination of a standard washer and a lock-ring washer.

To install the bollard on to the base, you simply slide it over the vertical fingers that stick up from the base unit, and then utilize the included allen bolts and washers to tighten the bollard on to the base.

The Finished Product…

Once installed, the only thing you have to do is set the operating mode and wait for darkness to fall. Each side of the bollard is independently configured by the power button on each side. The first press of the button configures that side to operate in high brightness mode, and success is confirmed by a single blink of the LEDs on that side. The second press configures that side to operate in low power mode, and success is confirmed by two blinks of the LEDs on that side. The third press turns that side off.

The finished product 🙂


If you are operating the lights on both sides of the unit, high power mode is 250 lumens per side. After 4 hours, the lamp will dim to 120 lumens per side to conserve battery. Any time motion is detected, it will bump back up to the full 250 lumen per side brightness for 30 seconds and then will re-dim itself. If you are only operating one side on high, you will enjoy 500 lumens of brightness and the light will dim to 250 lumens after four hours, and motion detection will spring the light back up to 500 lumens for 30 seconds.

If you are operating the lights on both sides of the unit, low power mode is 125 lumens per side. After 4 hours, the lamp will dim to 60 lumens per side to conserve battery. Any time motion is detected, it will bump back to the full 125 lumen per side brightness for 30 seconds and then will re-dim itself. If you are only operating one side on low, you will have 250 lumens of brightness and the light will dim to 120 after four hours and then motion detection would spring it back to 250 lumens for 30 seconds.

The Verdict…

This is a nicely designed unit that is easy to install and operate. The 6,000 mAh battery pack should provide days of dusk to dawn operation when it’s overcast, which is welcome when dealing with solar powered lighting. The brightness specifications are fantastic for battery/solar powered lighting and I really like that you can choose to run in either high or low power mode, and you can independently control the sides of the lamp. I will likely run this light at all times in LOW mode, due to the application here – however, for path lighting I would probably recommend that you run it in LOW mode in the winter (when overcast days are more common and lithium battery performance can sometimes struggle with cold temperatures) and HIGH in the summer months.

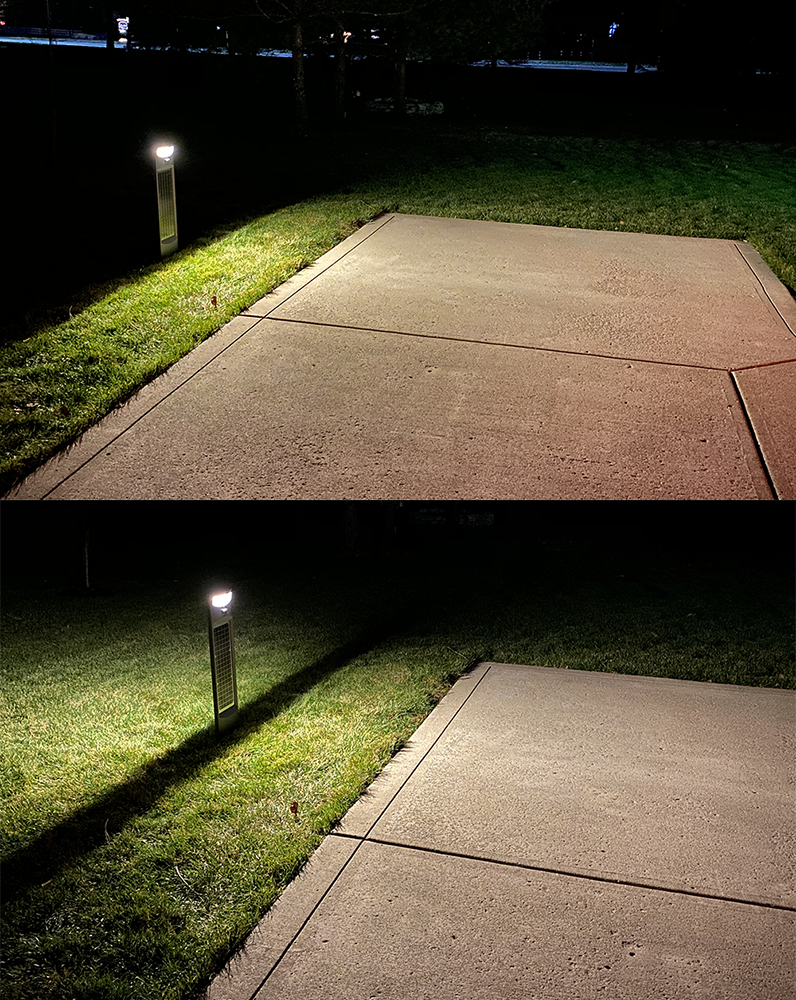
Top: The light on LOW setting on a single side.
Bottom: The light on HIGH setting on both sides.


As with my last solar light install, I have been impressed with Gama Sonic’s products and service. I’d recommend that anyone seriously considering a performant solar lighting solution check them out. Their product line is growing and so far my experience with them has been excellent.

Contact…

As I mentioned above, and in my previous article, Matt Cohen with Gama Sonic has been a great resource when researching and implementing my solar projects. Not only is he friendly and knowledgeable, he has offered to similarly help any of you in finding and buying the right lights for your desired applications at a discount over traditional big box retail pricing. If you are contemplating purchasing solar lighting solutions, I would recommend reaching out to him directly at matt@gamasonic.com or by phone 727-688-5030.

It’s Almost 2021 and people are still reusing passwords.

So… I have seen it a couple of times in the past month. A facebook friend has described how their bank account was “hacked”. Behind the scenes, however, they have “logins” for around 200 different websites, and on all of those websites – they share a common username/password wherever possible.

The problem is that when people make a password – they tend think of a specific arrangement of characters and symbols they can remember. Sure, Big84Brain!@% is a fine password… but if you use it everywhere, you’re asking for trouble.

Let’s take the above as an example. Let’s say you use that password for everything – your email, your bank, pinterest, facebook, twitter, amazon, and a couple of other small sites you visit. Uh-oh, problem…. one of the “small sites” gets hacked. In the process, the hacker gets a list of usernames and passwords. Now. all he/she has to do is write a script that tries to login to financial institutions with the list of usernames and passwords they recovered. Since you use the same password on your financial institution, if it’s one the hacker targets – your account will certainly be compromised.

Your password wasn’t horrible – it wasn’t just a dictionary word. It had upper and lowercase characters, it had numbers, and it had special characters. That all being said – your decision to use this “secure” password on every single site you visit has now caused your bank account to be drained. What’s a solution?

If you don’t want to use a password manager like 1password (1password.com) it’s good to think patterns rather than specific passwords. Patterns should make sense to you and result in a different, somewhat nonsensical password for every site you visit.

Want a simple example? Pick a base word – let’s say it’s “love”. Alone, it’s a horrible password. Now capitalize the first letter and add in your birth year – lets say its 1974. Now you have Love1974. Still horrible. So, shift the first two numbers of your birth year and add those in. Now you have Love!(74.

You still have a problem – because it’s too short, it contains a dictionary word, and it’s not unique to the site you are visiting. So, maybe try this… add in the 1st, 3rd, and 6th characters of the name of the site you are visiting at the end and put the partially shifted birth year in the middle of “Love” – applying this pattern, now you have the following hypothetical passwords for the following sites:

Facebook.com – Lo!(74vefco
pinterest.com – Lo!(74vepnr
hotmail.com – Lo!(74vehti

Notice something here? You’ve created a pattern that makes sense to you and is easy to remember, but creates nonsensical passwords that are different for each and every site you visit or service that you use. Hackers work by brute force – they won’t likely try to figure out patterns – they will try what works and move on. An ounce of prevention means hundreds of pounds of risk gets reduced for you. Come up with a pattern that makes your password unique on each site you visit – don’t make yourself a “victim”.

Now… this is a simple example… put your creative hats on and think pattern rather than password. Make sure you have something you can remember, something that uses numbers, special characters, and maybe even a couple of dictionary words mixed in – make the pattern memorable, and make sure it generates passwords that are at least 10-12 characters long. Once you come up with one, promptly go and change all of your passwords to fit your pattern – especially those you care about the most.

Once that’s done – for an extra dose of security, enable 2FA (two factor authentication) on any sites that are important to you that offer it. Banking institutions almost always do, Facebook does, Microsoft does, Google does. In this regard, even if someone has your password – they need the second factor (commonly a code received by text or push notification) in order to successfully breach your account – and when you get a mysterious text or push with a login code and you aren’t trying to login – you instantly know you’ve been compromised – but, unless they have the second factor, they have not successfully logged in. In this case, you just log in, change your password again, and move on. There are many other 2FA options (YubiKey, for example) – but that’s fodder for another post later on. For now – just stop repeating passwords 🙂

Technology vector image created by stories – www.freepik.com

The Original Web Geek